Using the Freeware Edition of HelpNDoc, you can create a Compiled HTML Help Format (CHM) table of contents in a mater of seconds, either by freely typing it, importing one from an existing CHM help file or using HelpNDoc’s interface to position the topics. This article presents the steps involved to easily and rapidly create a complete and structured table of content for your documentations.

Freely typing a table of contents
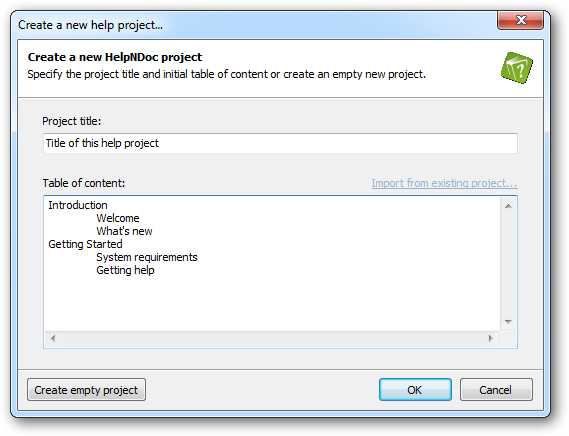
The fastest way to create a new table of contents from scratch is by using the free typing field from HelpNDoc’s new project wizard. This allows the documentation writer to only use the keyboard to rapidly type in the whole table of contents. Here are the steps involved:
- Launch HelpNDoc
- Create a new project using the “File” menu then click the “New Project” menu item. The new project wizard is shown
- Enter the title of your project in the “Project title” field
- In the “Table of contents” field start typing your first topic
- Hit enter and start typing your second topic
- Use the TAB keyboard key to increment the level of your topics
- Once done, click the “OK” button and your project is created with the specified table of contents
Importing an existing table of content from a CHM file
HelpNDoc is able to import the table of contents from an existing CHM help file. This is a tremendous time saver if you’d like to replicate the complete hierarchy of an existing documentation. Here is how to achieve that:
- Launch HelpNDoc
- Create a new project using the “File” menu then click the “New Project” menu item. The new project wizard is shown
- Enter the title of your project in the “Project title” field
- Click the “Import from existing project” link and choose the CHM file to import from
- The table of contents free type field will be updated with the table of contents extracted from that file
- Click the “OK” button and your project is created with the imported CHM table of contents
Using the interface and mouse to drag and drop your topics
Once a documentation project has been created in HelpNDoc, its table of contents can be improved and extended using the built-in table of contents editor. Everything happens in the “table of contents” part of HelpNDoc’s interface. Creating a new topic consists of the following steps:
- Click the “Insert new topic” button, the insert item interface will appear
- Choose how to position your item: as a child, before or after the currently selected topic or at the bottom of the current level
- Type in the caption of your new topic. HelpNDoc will automatically generate a unique topic ID for you
- Click the insert topic button. You topic is now part of the table of contents
Once topics have been added to the table of contents, the hierarchy can be modified: just move the topics around using the mouse or select it and move it using the “move item” drop down menu.
Final result

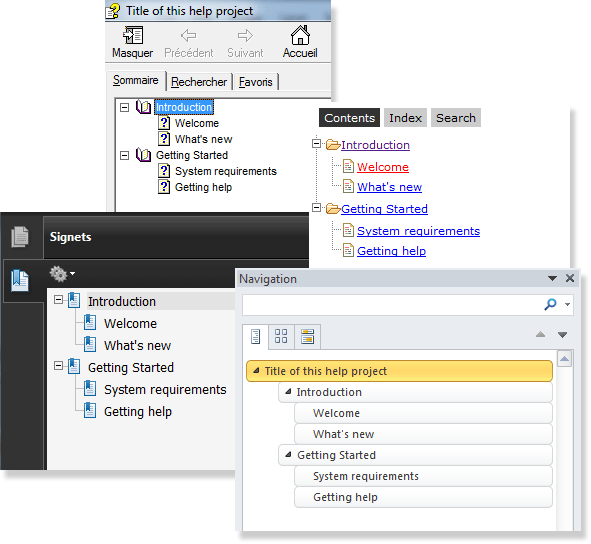
Now that a complex table of contents have been created, HelpNDoc can generate a complete set of documentation formats without any modification or interaction from your part. HelpNDoc will generate a standard Windows compiled CHM help file, a complete online HTML documentation, a Word document and a PDF document from a single click on the “compile” button. You can now publish your documentation the way you like.