Step-by-step guide: How to create a style to display a note or a warning message
You can create a style specifically designed to highlight sections of your documentation such as notes or warnings. Once the style is created, it can rapidly be re-used throughout the project.

Step 1: Add a new Style
Click the arrow in the lower-right hand corner of the Styles section of the Write ribbon tab.
This displays your Styles settings window.
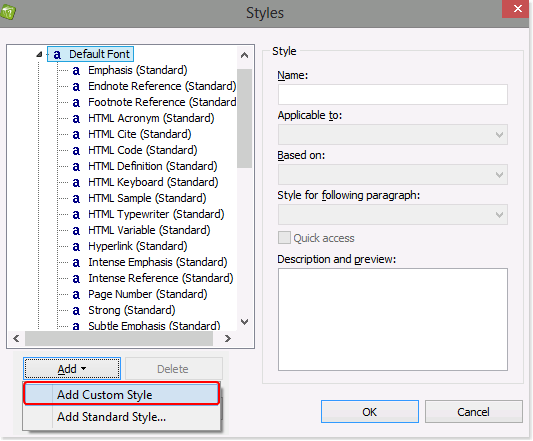
Click Add in the lower left-hand corner.
Select Add Custom Style.
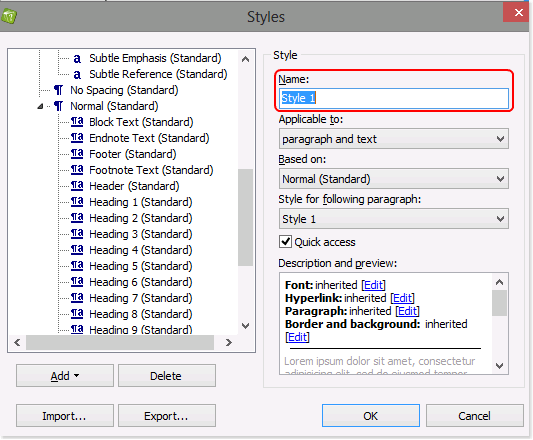
Step 2: Assign name
Enter the name of the new style so that it can easily spotted in the list. For example: “Notes”.
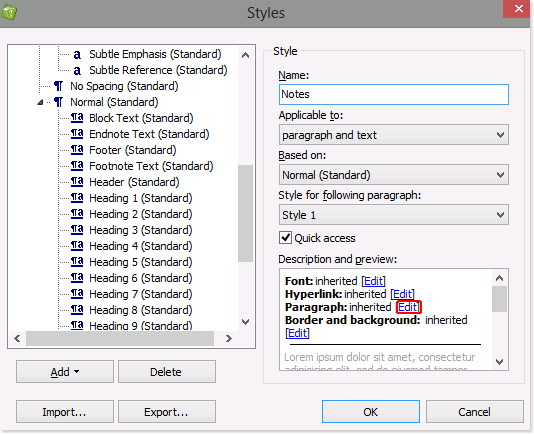
Step 3: Define Paragraph Settings
Click Edit to the right of Paragraph to opens the ‘Paragraph’ Settings window.
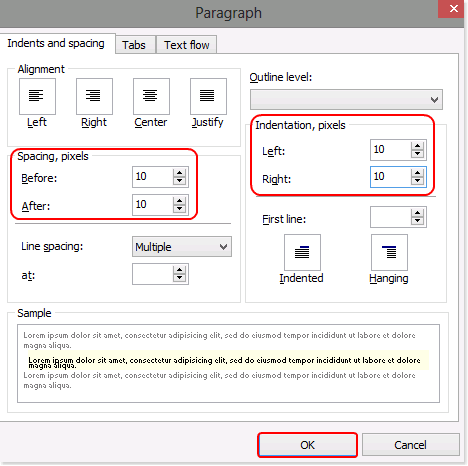
Spacing: Enter the number of pixels that you’d like to be inserted before and after paragraphs designated as Notes.
Indentation: Enter the number of pixels that you’d like to be indented to the left and right of Notes.
In the example shown, the above are both defined as 10 pixels.
Click OK to save your settings and return to the ‘Styles’ window.
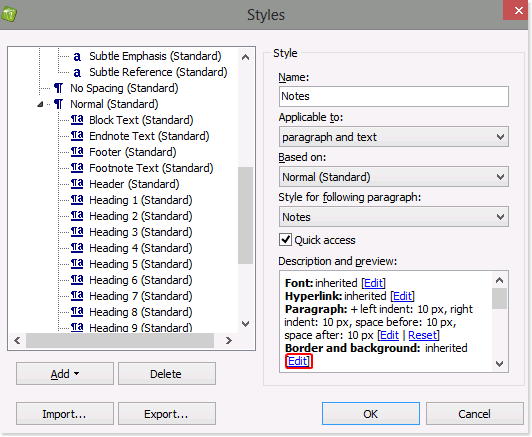
Step 4: Define Border and Background
Click Edit to the right of Border and Background to open the ‘Paragraph Border and Background’ Settings window.
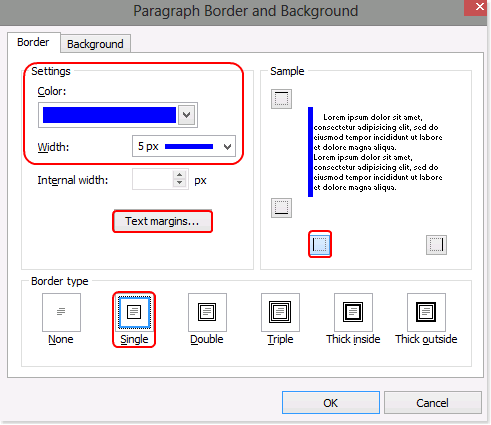
Border color and width: On the Border tab, select the color and width of the line that you’d like to use to set off Notes. In the example shown, blue and a width of five pixels were selected.
Border type: Select the style of border that will be used to demarcate Notes. In the example shown, a single line was selected.
Placement of border: By default, all borders are selected. Click a border to remove it. In the example shown, the top, bottom, and right borders were removed.
Click Text margins to access those Settings.
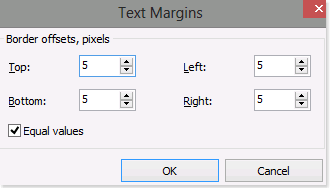
Text margins: Enter the size of the margins that you’d like to be used for your Notes. In the example on the left, each margin is defined as 5 pixels.
Click OK to save your entry and return to the ‘Paragraph Border and Background’ window.
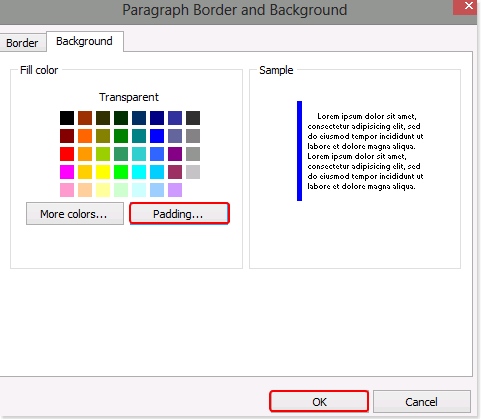
Click the ‘Background’ tab.
Then, click Padding to open the ‘Padding’ Settings window.
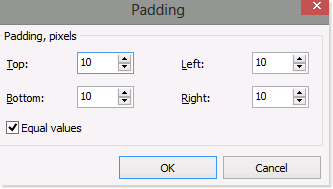
Background Padding: Enter the size of padding that you’d like to use for the background of your Notes. In the example on the left, padding is defined as 10 pixels.
Click OK to save your entry and return to the ‘Paragraph Border and Background’ window.
Step 5: Save settings
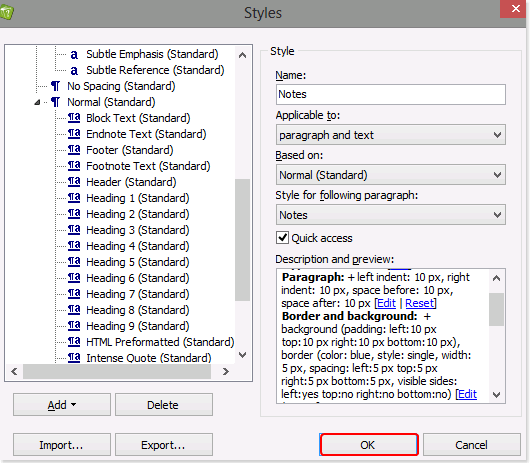
The settings you defined above are displayed in ‘Description and preview’ section of the ‘Styles’ window.
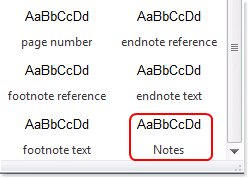
Click OK in the lower right-hand corner to save your entries. This closes the window and displays the Style you defined above in the ‘Styles’ section of the Write ribbon.
Step 6: Apply the Notes Style
Highlight the section in your text editor to which you’d like to apply your Notes Style.
Then, select the Style you defined above to apply it to the highlighted text. Styles are located in the ‘Write’ ribbon tab.

This simple, yet powerful feature offered by HelpNDoc can help you produce professional documentation easily and inexpensively. To learn about the many other easy ways to leverage your investment in your documentation, visit our other step-by-step guides: Online help - Learn how to use HelpNDoc.