Step-by-step guide: How to delete a build in HelpNDoc
You can define the builds that are generated when you publish your documentation. These builds are displayed in your build list and can be enabled or disabled at will. When a build becomes obsolete, it is possible to remove it from your build list.
There are two simple steps for deleting an obsolete output.
Step 1
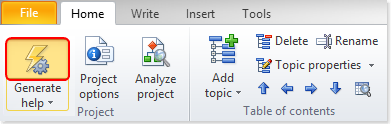
This displays the Generate Documentation window.
All of your outputs are listed along the left-hand side in your build list.
Step 2
Next, you’ll select the output that you’d like to delete. There are two ways to do this:
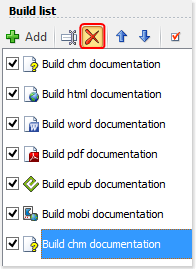
Option 1
Click the build that you’d like to remove. This highlights that build.
Click Delete in the build list menu.
This displays a message, confirming that you want to delete the build.
Click Yes.
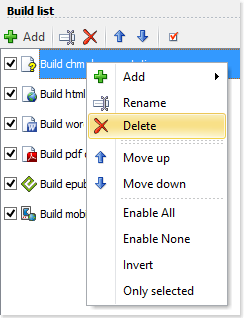
Option 2
Right-click the build that you’d like to remove. This displays a popup menu.
Click Delete.
This displays a message, confirming that you want to delete the build.
Click Yes.
This removes the build from your project. If a build is not obsolete but you temporarily do not want to publish it, consider deactivating it instead. The steps for deactivating outputs are outlined in another step-by-step guide: How to enable your publishing outputs in HelpNDoc.