Step-by-step guide: How to insert anchors
HelpNDoc offers you the option of inserting anchors in your topics to further enhance the usefulness of your hyperlinks. By default, hyperlinks take readers to the beginning of specific topics. When you insert anchors within topics you get the added benefit of being able to create hyperlinks to those embedded anchors. As a result, readers can be taken to exact locations within topics, rather than the beginning of topics.
Step 1
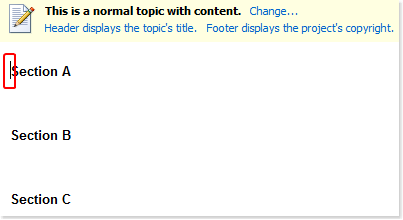
Place your cursor in the text editor where you’d like to insert the anchor.
You can click a word or place your cursor immediately before it. Or, you can highlight text.
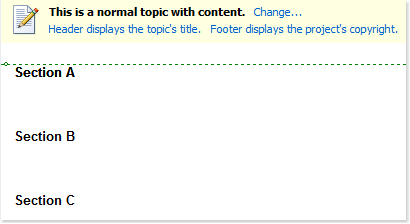
The anchor will be placed immediately above this location.

Step 2
Click Insert / Remove anchor in the Links section of the Insert ribbon tab.
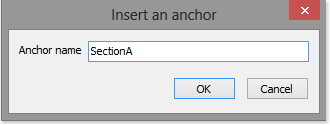
This displays the “Insert an anchor” window.
Step 3
After you assign a name to the anchor, click OK.
You may insert additional anchors following the steps outlined above.
After inserting anchors, you can create hyperlinks to them. The steps for creating hyperlinks are provided in another step-by-step guide. To remove an anchor, place your cursor on the text immediately below the anchor. Then, click Insert/remove anchor in the Links section of the Insert ribbon tab.