Step-by-step guide: How to rename a library item
Once items are added to the library, they can easily be renamed without losing any other property such as where they are added in your project’s topics.
There are four easy ways to rename a library item:

Option 1
Select the item in your library panel and then click Rename in the Library section of the Home ribbon tab.
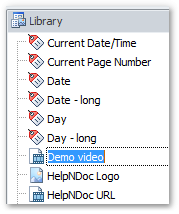
This switches the item name into “edit mode” allowing you to update it.
Enter the new name and press enter to save it.
Note: Some items such as system variables can’t be renamed. Therefore, if you select a system variable in the library panel, Rename remains gray, prohibiting you from clicking it.
Option 2
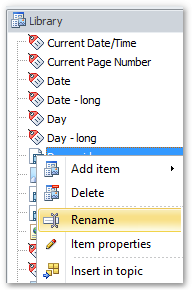
Right-click the item in your library panel that you’d like to update to display the popup menu.
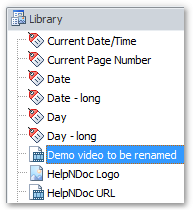
Click Rename: this switches the item name into “edit mode” allowing you to update it.
Enter the new name and press enter to save it.
Option 3
Double-click the item in your library panel that you’d like to update.
This opens the window that displays the properties you had defined for that item.
Enter the new name and click OK to save your change.

Option 4
Click the item in your library panel that you’d like to update.
Press F2 on your keyboard.
This switches the item name into “edit mode” allowing you to update it.
Enter the new name and press enter to save it.
After you save the new name, the items in your library panel are displayed in an updated alphabetical order. Also, the updated name is displayed in your text editor in each occurrence of that item throughout your entire project.