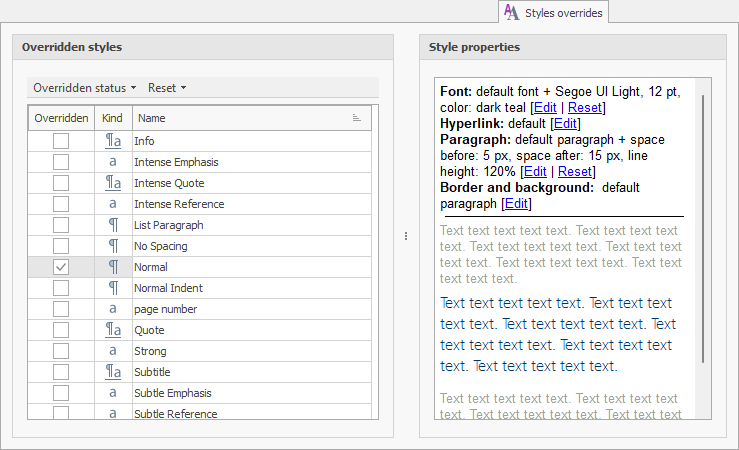
Override styles
Any style created within the project can be overridden by each documentation build: every documentation output can have its own set of customized styles. Once a style has been overridden for a specific build, the overridden values set for this style will be used next time the build is generated.

Access the "Styles overrides" panel
Each build have its own set of overridden styles. To access the "Styles overrides" panel:
- From HelpNDoc's "File" menu, click the top part of the "Generate help" button to show the "Generate documentation" window
- Select a build in the build list
- Click "Customize" if the build customization tabs are not visible yet
- Navigate to the "Styles overrides" tab
Overriding styles
To override a specific style for the selected build, its "Overridden" column must be checked:
- Locate the style to override in the "Styles overrides" panel
- Check its "Overridden" checkbox
Changing an overridden styles' properties
Each style available in the project is listed in the "Styles overrides" panel. To change the properties of a specific style:
- Select the desired styles in the list
- In the "Styles properties" panel, click the "Edit" link next to its properties to update it
Quickly change the overridden status of styles
From the "Styles overrides" panel, use the "Overridden status" popup menu to:
- Override all: Check all styles as overridden
- Override none: Un-check all styles override status
- Invert overridden status: Invert the overridden status for all styles
- Override selection: Override only the selected styles
- Insert selection's overridden status: Invert the overridden status for the selected styles
Resetting overridden styles
From the "Styles overrides" panel, use the "Reset" to reset the properties of overridden styles:
- Reset all: Reset the modified styles properties for all styles
- Reset selected: Reset the modified styles properties for the selected styles only